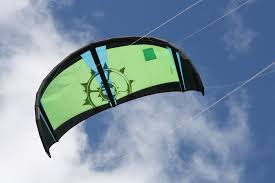
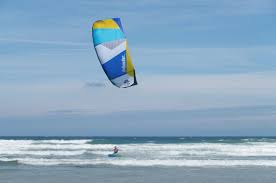
Kiteboarding is one of the latest water sport that is slowing gaining traction in the world. Just take a look at the Top 10 Female Kiteboarders To Follow On Instagram and you will see a plethora of skillful kiteboarders who are so good in what they do, that they started to have a huge social base.
But the entry to the sport can be tough, as you will be faced with obstacles such as lack of skill or even the lack of funds to purchase your own kiteboarding equipment. Of course, you will be able to DIY your own kiteboarding equipment, but perhaps that is not catered to the masses.
But hey, if you have decided to make your own kiteboarding kite, then we have just the guide for you! We have compiled a list of steps that you will need to take in order to make your very own kiteboarding kite. Read on!
DIY Guide On Making Your Own Kiteboarding Kite
 Okay, now you have a thought to make your own kiteboarding kite. Glad to have you here! It’s not only in kites but in every DIY product, the question arises, why not buy instead? Genuine question though, yet, on the contrary building a product comes with its own perks.
Kiteboarding is an expensive sport as most of the gear can be expensive, and that is not including the travel cost and classes for it. Now, making your own kite will save you a lot of bucks. Moreover, you can do some bragging about your creative engineering skills too. Not many people will have the tenacity to make their own kite.
 First things first. We need to consider a few things before proceeding towards the craft of kite. Of course, some required equipment such as the sewing machine and cloth scissors will be mandatory. Apart from that, here’s what you need to look at:
- Order your instruction manual for making a kite.
- Consider PVC material for building the kite where the welding will work, unlike any other plastic.
- The strongest thread should be picked for this purpose as the kite will be exposed to a lot of wind force and acceleration.
- Always get extra ripstop material than what you need as it provides an ease in cutting through.
- Get your plans ready in a printed form, a tricky part though, but makes the task a lot easier for the latter half. You can always customize with your own measurements. Don’t forget to check out here and here for reference. Also, this guy gives one of the best DIY instruction when it comes to making your own kiteboarding kite.
The overall summary of materials required will be the polyester thread, weldable armbands, fabric (example dacron), ripstop nylon with webbing and PVC shower curtains.
Once you have the things ready, you are good to start with the process. No rush, remain steady throughout the process and you will get an amazing kite of your own. Let’s get started with the steps:
- Use a marker to mark the patterns on the fabric according to your printed plan and make sure to cut each pattern twice.
- Be careful with tracing the panels on the nylon ripstop as it will be very slippery while you handle it. Use a scale-board for grip and correct measurements.
- A seam stitch will be fine for stitching every panel together, you can find easy video instructions over the internet for it.
- Follow your instruction manual which you ordered and go step by step with the assembly. An example order of assembly can be combining the battens and the leading tube together, then sewing the zippers to the marking of the batten and the tube.
- For that you need to stitch the leading edges of the tube without shutting the ends completely.
- Next is stitching the batten to the tube. You can use any stitch as per the instructions you are following.
- Then the tube is stitched shut, followed by stitching of the main canopy. Then both are combined with stitches.
- Final step is when you sew the batten pockets (wing-tip) and of course attaching the webbing straps to the lines. Tadaa! your first kite is ready.
Depending on the type of manual you are following, the instructions might vary. All the best to you for this process. Happy DIY!

